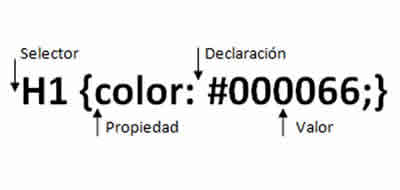
HTML simple effects - Tags b, i, u, s, h1 - h6 & blockquote
To modify the Text appearance in HTML tags are used to create bold, italics, underlined headings, strikethroughs and textual citations.
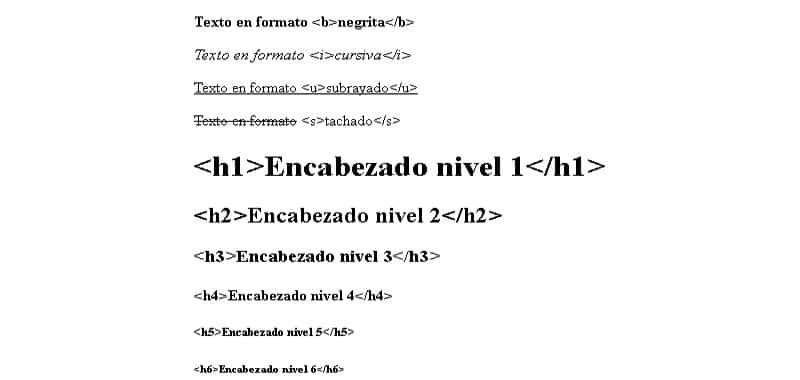
We already know more about HTML text. Now let's see how we can give that text some simple effects to modify its appearance.
Observe the following code, which we will record with the name of simple_effects_1.html
<html>
<head>
<title>
Ejemplo de efectos simples
</title>
</head>
<body>
<b>
Esto es letra negrita.
</b>
<br>
<i>
Esto es letra cursiva
</i>
<br>
<u>
Esto aparece subrayado
</u>
<br>
<s>
Esto aparece tachado
</s>
<br>
Este texto no tiene efectos.
>
</body>
</html>
The result can be seen below:
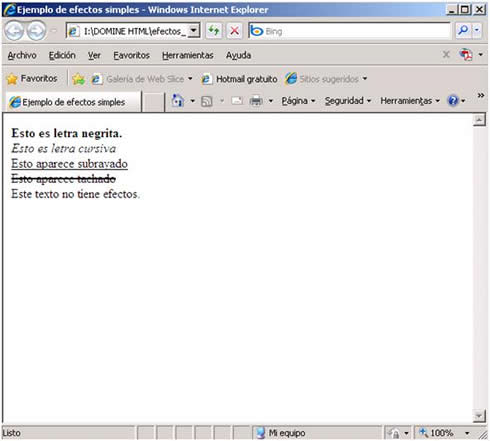
Now the text that appears between the tags <b> and </b> is in bold. L b indicates bold (bold). The text that appears between the tags <i> and </i> appears in italics. The i refers to italic (italics). The text that appears between the <u> and </u> tags is underlined. The u means underlined (underlined). The text that appears between the <s> and </s> tags is crossed out. The s means strike (strike).
With this we already have some applied effects, which allow us to do a lot of things. Realize how extremely easy it is, in HTML, to give a text the appropriate appearance in each case. Although little by little, we will see other more complex effects, the philosophy of this language is ease of use.
That does not mean it's "sewing and singing," of course. When we get to know the DHTML, we will see that everything that we now modify in a simple way, can also be modified in another more sophisticated way, although of course, more efficient.
Choosing one technique or another will depend, in any case, on each specific design. Only with practice, we will be able to know what kind of jobs you should do in each case.
We can also change several effects in a single text. Let's see an example. Type the following code and store it as simple_effects_2.html
<html>
<head>
<title>
Ejemplo de efectos simples
</title>
</head>
<body>
<b><i><u>
Esto es letra negrita, cursiva y subrayada.
</u></i></b>
<br>
Este texto no tiene efectos.
</body>
</html>
The result of this code is the one shown in the following figure:
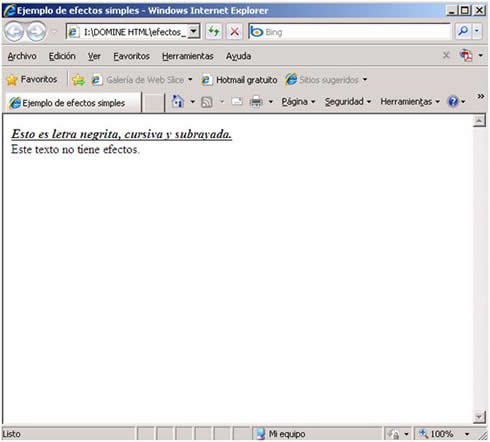
There is another way to get the bold type. Instead of enclosing the text between the <b> and </b> tags, you can enclose them between the <strong> and </strong> tags. The result is the same, so we will use the first, because of the law of minimum effort. There is also an alternative way to get cursive. Instead of enclosing the text between the tags <i> and </i>, we can enclose them between the tags <cite> and </cite>. The result is identical. As in the previous case, we will choose the first tag, for the same reason
As shown in the last example, I used the three nested tags (one inside the other) to "accumulate" their effects on the text. Look at one very important thing: When I nest different tags, I must close the last one first, and vice versa. That is, the tags always close in reverse order to the one that opens.
The opposite is an error that can, in certain cases, lead to failures on the page. For example, look at the following variant of the previous code.
<html>
<head>
<title>
Ejemplo de efecto simple
</title>
</head>
<body>
<b><i><u>
Esto es letra negrita, cursiva y subrayada.
</b></i></u>
<br>
Este texto no tiene efectos.
<body>
</html>
This code would be incorrect, since the three tags that are nested are closed in the same order in which they were opened. That is, they are not really nested, but rather, overlapping. In this particular case, the code works the same, because the tags we have used are very simple.
However, this is an exception. The normal thing if overlapping tags are used, instead of nested, is that unpredictable failures occur.
We may need to use a text as a heading or headline of another text, as if it were an article in a newspaper. Let's see how to do it. Type the following code and save it as header_1.html
<html>
<head>
<title>
Encabezamientos
</title>
</head>
<body>
<h1>
Esto es el titular
</h1>
Esto es el texto normal. <br>
Como ve, continua debajo del titular
</body>
</html>
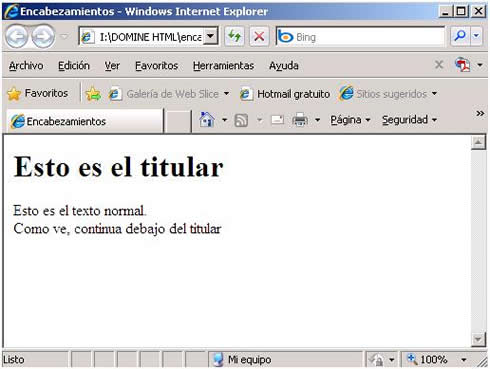
The result is the one you see in the previous figure, as you can see, the text of the headline has been included between the tags <h1> and </h1>. This tag has had two effects on the text. On the one hand, he has created a large letter. On the other hand, you have included a paragraph break in the page, without the need to use, in this case, the <p> and </p> tags. There are other similar tags that change the size of the letter including, in addition, paragraph break, although in most cases, it is preferable to control ourselves the paragraph breaks, size changes and other effects. Do not worry. With time and experience, you will learn to create texts as you wish, with all flexibility.
Different tags are used for holders, sub-holders, footnotes, etc., simply by changing the number 1 that appears in this tag by another number (up to 6), as the following example shows. Type the code and save it as header_2.html
<html>
<head>
<title>
Encabezamientos
</title>
</head>
<body>
<h1>Esto es texto con h1. </h1>
<h2>Esto es texto con h2.</h2>
<h3>Esto es texto con h3.</h3>
<h4>Esto es texto con h4.</h4>
<h5>Esto es texto con h5.</h5>
<h6>Esto es texto con h6.</h6>
Esto es el texto normal.<br>
Como ve, continúa debajo del titular.
</body>
</html>
The result of this code can be seen below:
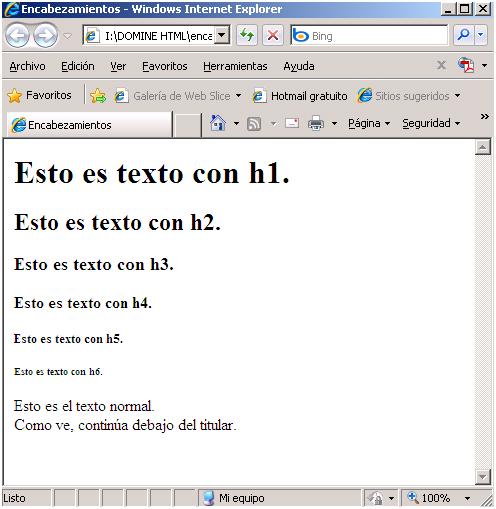
Header tags (from <h1> to <h6>) are used for specific sections of a web document. For example, if we are preparing a document whose content is a didactic text, it is quite usual that we use the <h1> tag for the general header <h5> or, even, the <h6> for, for example, the footnotes of page. We can use the <h2>, <h3> and <h4> tags to separate different sections or subsections of our document.
A fairly good practice, in this phase of your learning, may be to change these headings with bold type, italic and underline, to achieve headers or more elaborate footnotes.
Note that the higher the number used, the smaller the owner becomes. In the case of the text between <h6> and </h6>, it is practically illegible. And, if you are wondering, there is a way to change the size of the letter without the paragraph breaks occur: it is the tag <font>, which we will see in the next section.
Now suppose we are creating a web page of mathematical topics. We may have to use superscripts to represent certain formulas or arithmetic expressions. Let's see how to do it. Type the following code and save it as indexes_1.html
<html>
<head>
<title>
Superíndices y Subíndices
</title>
</head>
<body>
Esto es un texto normal
<sup>
Esto es un superíndice
</sup>
<br>
Esto es texto normal
<sub>
Esto es un subíndice
</sub>
</body>
</html>
The result of the previous code can be seen in the following figure:
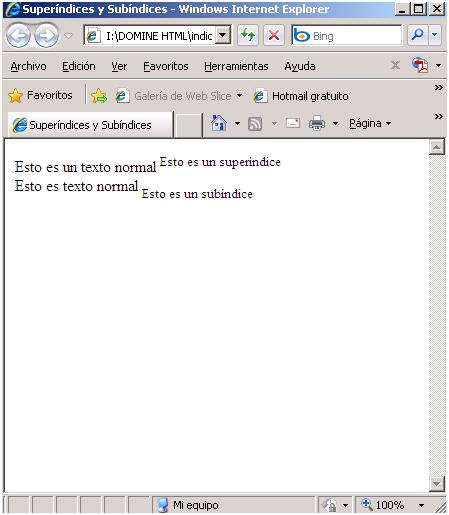
As you can see, the text included between the tags <sup> and </sup> appears as a superscript. The text included between the <sub> and </sub> tags appear as subscripts. These tags do not generate line or paragraph breaks, and do not receive any attributes.
Let's see another effect that we can give to the text. As you already know, when we enter text in the code, line breaks are not maintained unless we specifically indicate it by means of <br> or another system. In addition, the browser does not respect the tabulations, or several spaces, or empty lines ... in short, almost nothing. However, there is a little trick to trick the browser and make it respect the original format of the text. Type the following example code and save it as format_1.html
<html>
<head>
<title>
Uso de preformato
</title>
</head>
<body>
Esto es una línea de texto con varios espacios en blanco.
Esto es otra línea con tabulaciones.
Esto está tres líneas más abajo
<body>
</html>
The result of this code is seen in the following figure:
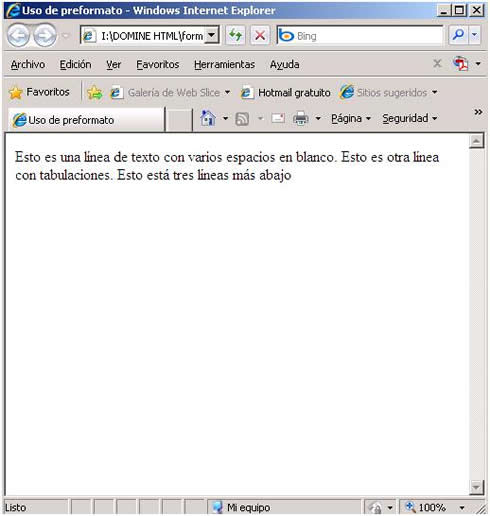
As you can see, the browser ignores it. Put the text, approximately, where he wants. This is the normal behavior of any browser, in any version that we use and on any platform. Now let's cheat him. We will enclose the text between the tags <pre> and </pre>
The code is as you see in the following list, called formateo_2.html
<html>
<head>
<title>
Uso de preformateo
</title>
</head>
<body>
<pre>
Esto es una línea de texto con varios espacios en blanco.
Esto es otra línea con tabulaciones
Esto está tres líneas más abajo.
</pre>
</body>
</html>
Notice the result that appears in the following figure:
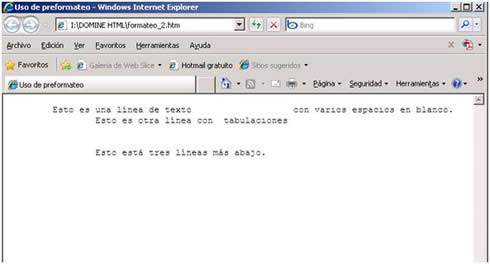
Notice that it is now presented, exactly the format that we gave to the text in the code. However, an unexpected effect appears: the font has changed. By default, the browser uses the font known as Times Roman.
When we use the <pre> tag, the default typography is what is known as Courier New. All this can be changed by using the <font> tag that we will see in the next section.
If what we want is to simply bleed the text without further ado, we can enclose the text that we want to appear indented between the <blockquote> and </blockquote> tags. Type the following list and save it as indented_1.html
<html>
<head>
<title>
Uso de sangrados
</title>
</head>
<body>
Texto normal. No aparece sangrado.
<blockquote>
Texto sangrado.<br>
Más texto sangrado.
</blockquote>
Este texto es normal
</body>
</html>
The result is that it appears below:
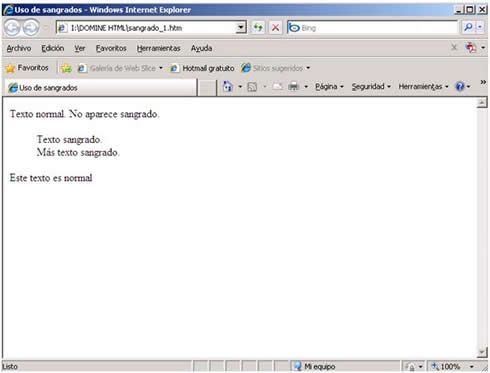
How you see, the use of the <blockquote> tag introduces a bleed into the text. It also introduces a paragraph break when <blockquote> is opened and another when </blockquote> is closed.
CITE ARTICLE
For homework, research, thesis, books, magazines, blogs or academic articles
APA Format Reference:
Delgado, Hugo. (2019).
HTML simple effects - Tags b, i, u, s, h1 - h6 & blockquote.
Retrieved Nov 11, 2025, from
https://disenowebakus.net/en/html-text-formatting

